|
|
 |
| Features |
 A&D's world-class Class 0.5 testing machine A&D's world-class Class 0.5 testing machine
 Load frame stiffness has been greatly improved by 30% Load frame stiffness has been greatly improved by 30%
 Rated output accuracy of up to 1/500 is guaranteed Rated output accuracy of up to 1/500 is guaranteed
 High-speed sampling:1 msec High-speed sampling:1 msec
 A maximum of 13 input signal channels A maximum of 13 input signal channels
 Color touch panel (optional) Color touch panel (optional)
 Various operational environments Various operational environments |
 |
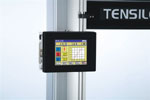
| Color Touch panel |
| The color touch panel offers superb visibility and easier operation. |
 |
| Either the color touch panel OP-01 or MSAT data processing software (on a personal computer) can be selected for user interface. |
| |
Touch Panel |
MSAT |
Display |
Commander |
Recorder |
| RTF with Touch panel |
OP-01 |
Optional |
Optional |
Optional |
Optional |
|
 |
Test Screen
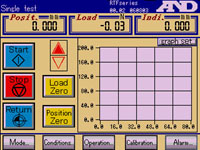
The main window for displaying a graph and starting a test |
Mode Selection
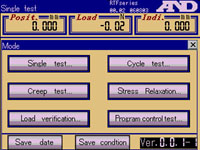
Select testing mode |
Condition Measurement
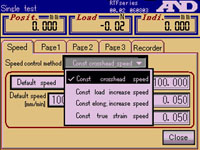
Setting test speed, such as constant crosshead
speed and constant load increase speed |
Operation Window
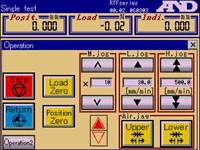
Ultra-fine, fine and coarse adjustments possible |
Load Calibration
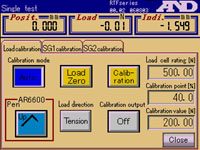
Simple load calibration with the touch of a button |
|
 |
|
 |
| MSAT (Multi Signal Analysis Testing) |
Data processing software
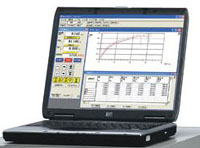 |
| The MSAT series is equipped with functions for not only testing machine operation but also data analysis, calculation and data storage for each testing mode. The operator can select Standard test (tensile, compression and bending) mode, Peeling test mode, Cycle test mode, Creep test mode, Stress relaxation test mode etc. depending on the purpose of the test. |
 |
| PC operation environment OS: Windows XP Professional. Program size: 80Mb or smaller. Memory requirement: 512Mb or over. Authority requirement: Administrator authority. USB: One USB port. Display resolution: 800x600 dots or higher color display. |
| |
Touch Panel |
MSAT |
Display |
Commander |
Recorder |
| MSAT |
Optional |
Standard
(Mandatory) |
Optional |
Optional |
Optional |
|
 |
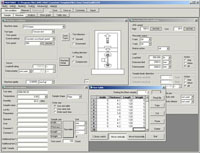
| Standard layout setting during a measurement |
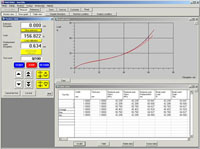
Status Display Window,
Graph Display Window and Table Display Window |
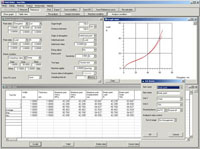
Operation Conditions Window, Sample Information Window,
Detailed Conditions Window, Dimension Table Window |
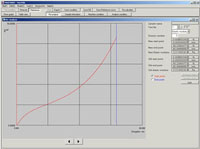
Analysis Condition Window, Table Display Window,
Arbitrary Formula Window |
Reanalysis Window |
|
 |
| Display & Commander |
RTF series with user interface for advanced operation
 |
 |
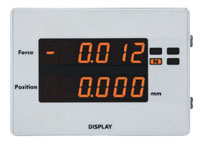
| Display |
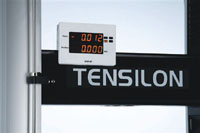
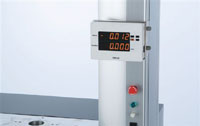
| Detachable digital display for load and displacement indication. This display can be attached with magnets to any part of the machine and it does not obstruct the user when fixing a sample to the jig or testing a sample as its position can be freely adjusted. |
| Fixing method |
Magnet attachment method |
| Display data |
Load/displacement |
| Load |
6-digit indication |
| Displacement |
6-digit indication |
|
 |
| Load |
6-digit indication
The indication unit will be automatically selected from kN, N, mN or N. |
 |
| Displacement |
1/1000 display at minimum
The detachable display offers a more organized and efficient workspace.
  |
 |
| Commander |
Handy compact commander for testing machine control. This commander can be attached to the top, bottom, left or right of the testing machine digital display for load and displacement indication.
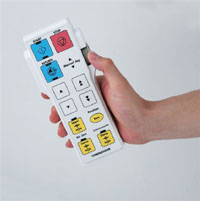 |
The commander's manual operation buttons are ergonomically designed with bright colors and varied sizes for superior ease-of-use. The jog dial on the right hand side of the commander offers extra flexible control and the operator can move the crosshead up and down by manually rotating this dial. |
|
 |
| Applications |
| A&D's wide range of applied products for even more advanced applications : |
| Applied test jigs for strength measurement |
Screw action jaws
 |
Air jaws
 |
Compression cage
 |
Wedge action jaws
 |
Compression test jig
 |
Compression type bending test jig
 |
|
 |
| Applied testing devices for elongation measurement |
SG series strain gauge device for measuring
distance between gauge marks
 |
Non-contact extensometer between gauge marks
 |
|
 |
| Applications |
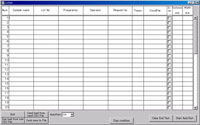
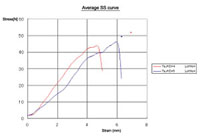
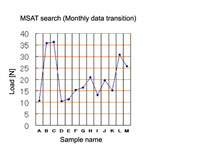
LOT SET Application
 |
Excel PU
 |
Quality control application
 |
|
 |
| Applied testing devices for temperature / environment test |
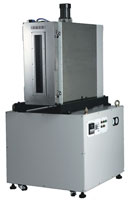
· Constant temperature / constant humidity testing devices
· High temperature testing devices
· Ultra-low temperature testing devices
· High humidity in gas atmosphere testing devices
· High humidity in vacuum testing devices
· Dipping testing devices |
 |
| Data Recorder |
Analog recorder (AR-6600-7)
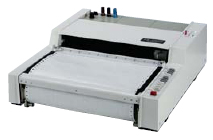
This recorder is equipped with a control panel providing easy setup with one-touch zero-span adjustment and auto ranging. |
 |
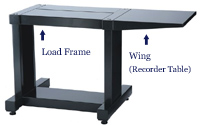
| Load frame table |
 |
| |
Dimensions (mm) |
| RTF-20 for RTF-1310, RTF-1250, RTF-1225 and RTF-1210 |
680(W)x555(D)x630(H) |
| RTF-22 for RTF-1350 and RTF-1325 |
897(W)x650(D)x460(H) |
|
 |
| Recorder table (Wing) |
| |
Dimensions (mm) |
| RTF-21 for RTF-1350 and RTF-1325 |
420mm(W)x430mm(D)
Can be mounted on either the right or left side. |
| RTF-23 for RTF-1310, RTF-1250, RTF-1225 and RTF-1210 |
420mm(W)x430mm(D)
Can be mounted on either the right or left side. |
Wing (sold separately) |
 |
| Specification |
|
RTF-2430 |
RTF-2425 |
RTF-2410 |
RTF-2350 |
RTF-2325 |
| Loading System |
Closed-loop micro-computer controlled digital servo mechanism |
| Maximum Capacity |
300kN |
250kN |
100kN |
50kN |
25kN |
| Test Width (mm) |
590mm |
| Crosshead Stroke (mm) |
1370mm |
1160mm |
1180mm |
1210mm |
| Effective Stroke (mm) |
625mm |
720mm |
798mm |
828mm |
| Crosshead Speed (mm/min) |
0.0005 - 500mm/min |
0.0005 - 1000mm/min |
| Speed Accuracy |
±0.1% |
| Crosshead Return Speed (mm/min) |
500mm/min or 250mm/min |
1000mm/min or 500mm/min |
| Load Measurement Accuracy |
±1% of indicated value |
±0.5% of indicated value |
| Load Range |
Full Auto Range ( max. 128 times) |
| Load Calibration |
One touch auto-calibration |
| Safety Function for overloading |
Provided |
| Sample Break Detection |
Provided |
| Stroke Limiter |
2 points Upper/Lower |
| Sampling speed |
1msec |
| Weight |
1300kg |
780kg |
|
 |
|
RTF-1350 |
RTF-1325 |
RTF-1310 |
RTF-1250 |
RTF-1225 |
RTF-1210 |
| Loading System |
Closed-loop micro-computer controlled digital servo mechanism |
| Maximum Capacity |
50kN |
25kN |
10kN |
5kN |
2.5kN |
1kN |
| Test Width (mm) |
590mm |
420mm |
| Crosshead Stroke (mm) |
1000mm |
1100mm |
| Effective Stroke (mm) |
618mm |
580mm |
690mm |
665mm |
775mm |
| Crosshead Speed (mm/min) |
0.0005 - 1000mm/min |
| Speed Accuracy |
±0.1% |
| Crosshead Return Speed (mm/min) |
1000mm/min or 500mm/min |
| Load Measurement Accuracy |
±0.5% of indicated value |
| Load Range |
Full Auto Range ( max. 128 times) |
| Load Calibration |
One touch auto-calibration |
| Safety Function for overloading |
Provided |
| Sample Break Detection |
Provided |
| Stroke Limiter |
2 points Upper/Lower |
| Sampling speed |
1msec |
| Weight |
330kg |
110kg |
|